
使用Typora_plugin实现Hexo博客绝对路径一键替换相对路径|正斜杠替换为反斜杠

使用 Typora_plugin 实现 Hexo 博客绝对路径一键替换相对路径|正斜杠替换为反斜杠
今天下午偶然的发现,解决了我很久以来一直想解决的问题,因为在 Hexo 博客上传的时候我一般是把图片插入进去,但是默认的路径是绝对路径,曾经在 Typora 设置里改过,但是效果也不好,今天想起了 Typora plugin,于是想基于 Typora plugin 开发一个插件
首先感谢 Typora plugin 开发者 https://github.com/obgnail/typora_plugin/
真心感谢插件开发大佬😭😭😭😭😭😭😭😭😭😭😭
我把问题抛给大佬,大佬轮子都给我造好了,而且还有礼貌,我说我写个安装文档提供给其他有需要的用户使用,他甚至还麻烦我

脚本适用情况
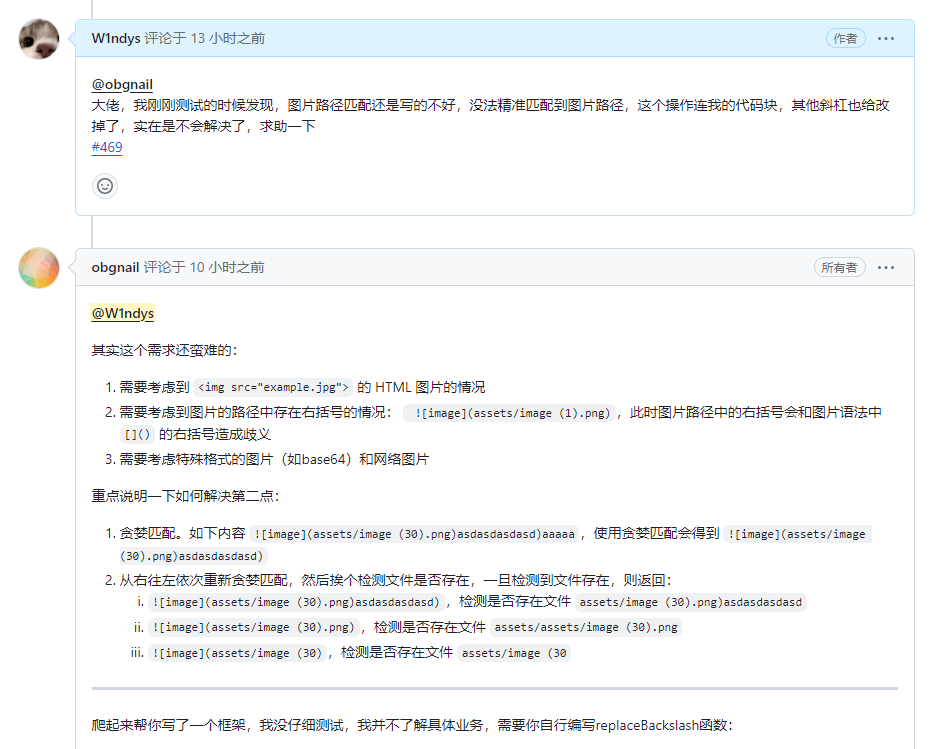
该脚本主要实现功能是,Markdown 中所有的图片路径中正斜杠一键替换为反斜杠,并把包含../images/的路径替换为相对路径,方便 Hexo 博客上传
例如 Markdown 中文件路径是 [示例图片](F:/Hexo/source../images/test.png)
替换后的路径就是 [示例图片](../images/test.png)
本脚本适用于:Hexo 博客写作排版,Hexo 图片放在/source/文件下的 Hexo 博客作者
安装 Typora plugin
有关插件的安装教程可以看官方的仓库,Readme 写的很详细了
https://github.com/obgnail/typora_plugin/
创建 JS
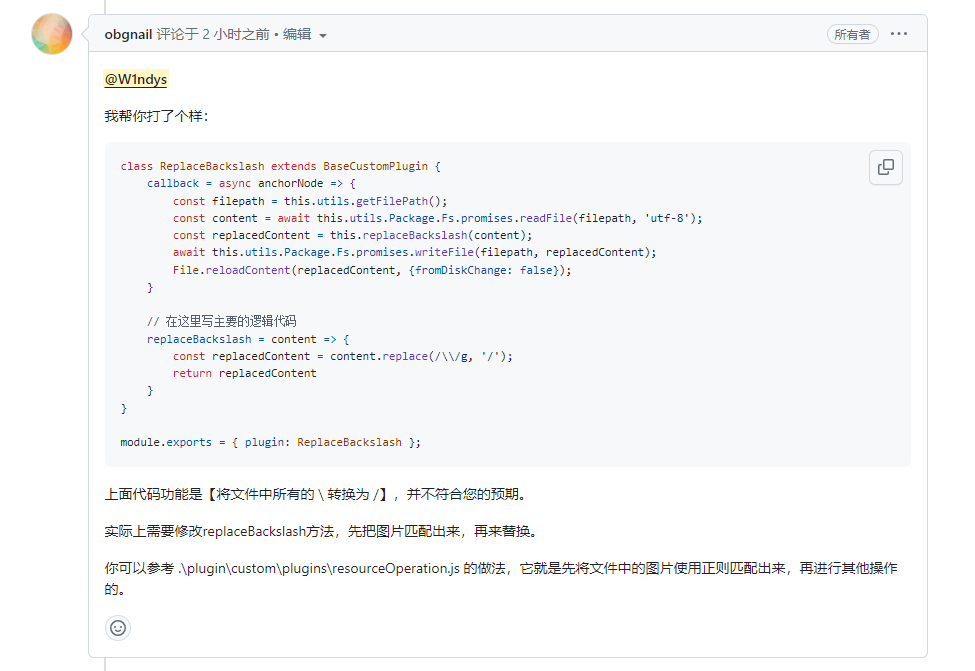
在 ./plugin/custom/plugins/ReplaceBackslash.js 文件中创建 js 文件,把下面代码复制进去。
1 | class ReplaceBackslash extends BaseCustomPlugin { |
启用插件
- 修改
./plugin/global/settings/custom_plugin.user.toml,添加配置:
1 | [ReplaceBackslash] |
这里引号内的内容改为你自己的文件夹命名
添加快捷方式
添加快捷键
修改 ./plugin/global/settings/custom_plugin.user.toml,添加配置
在上一步的基础上,继续添加一行代码
1 | [ReplaceBackslash.config] |
这里快捷键设置为 ctrl+shift+m 可以根据自己需要修改
添加快捷按钮
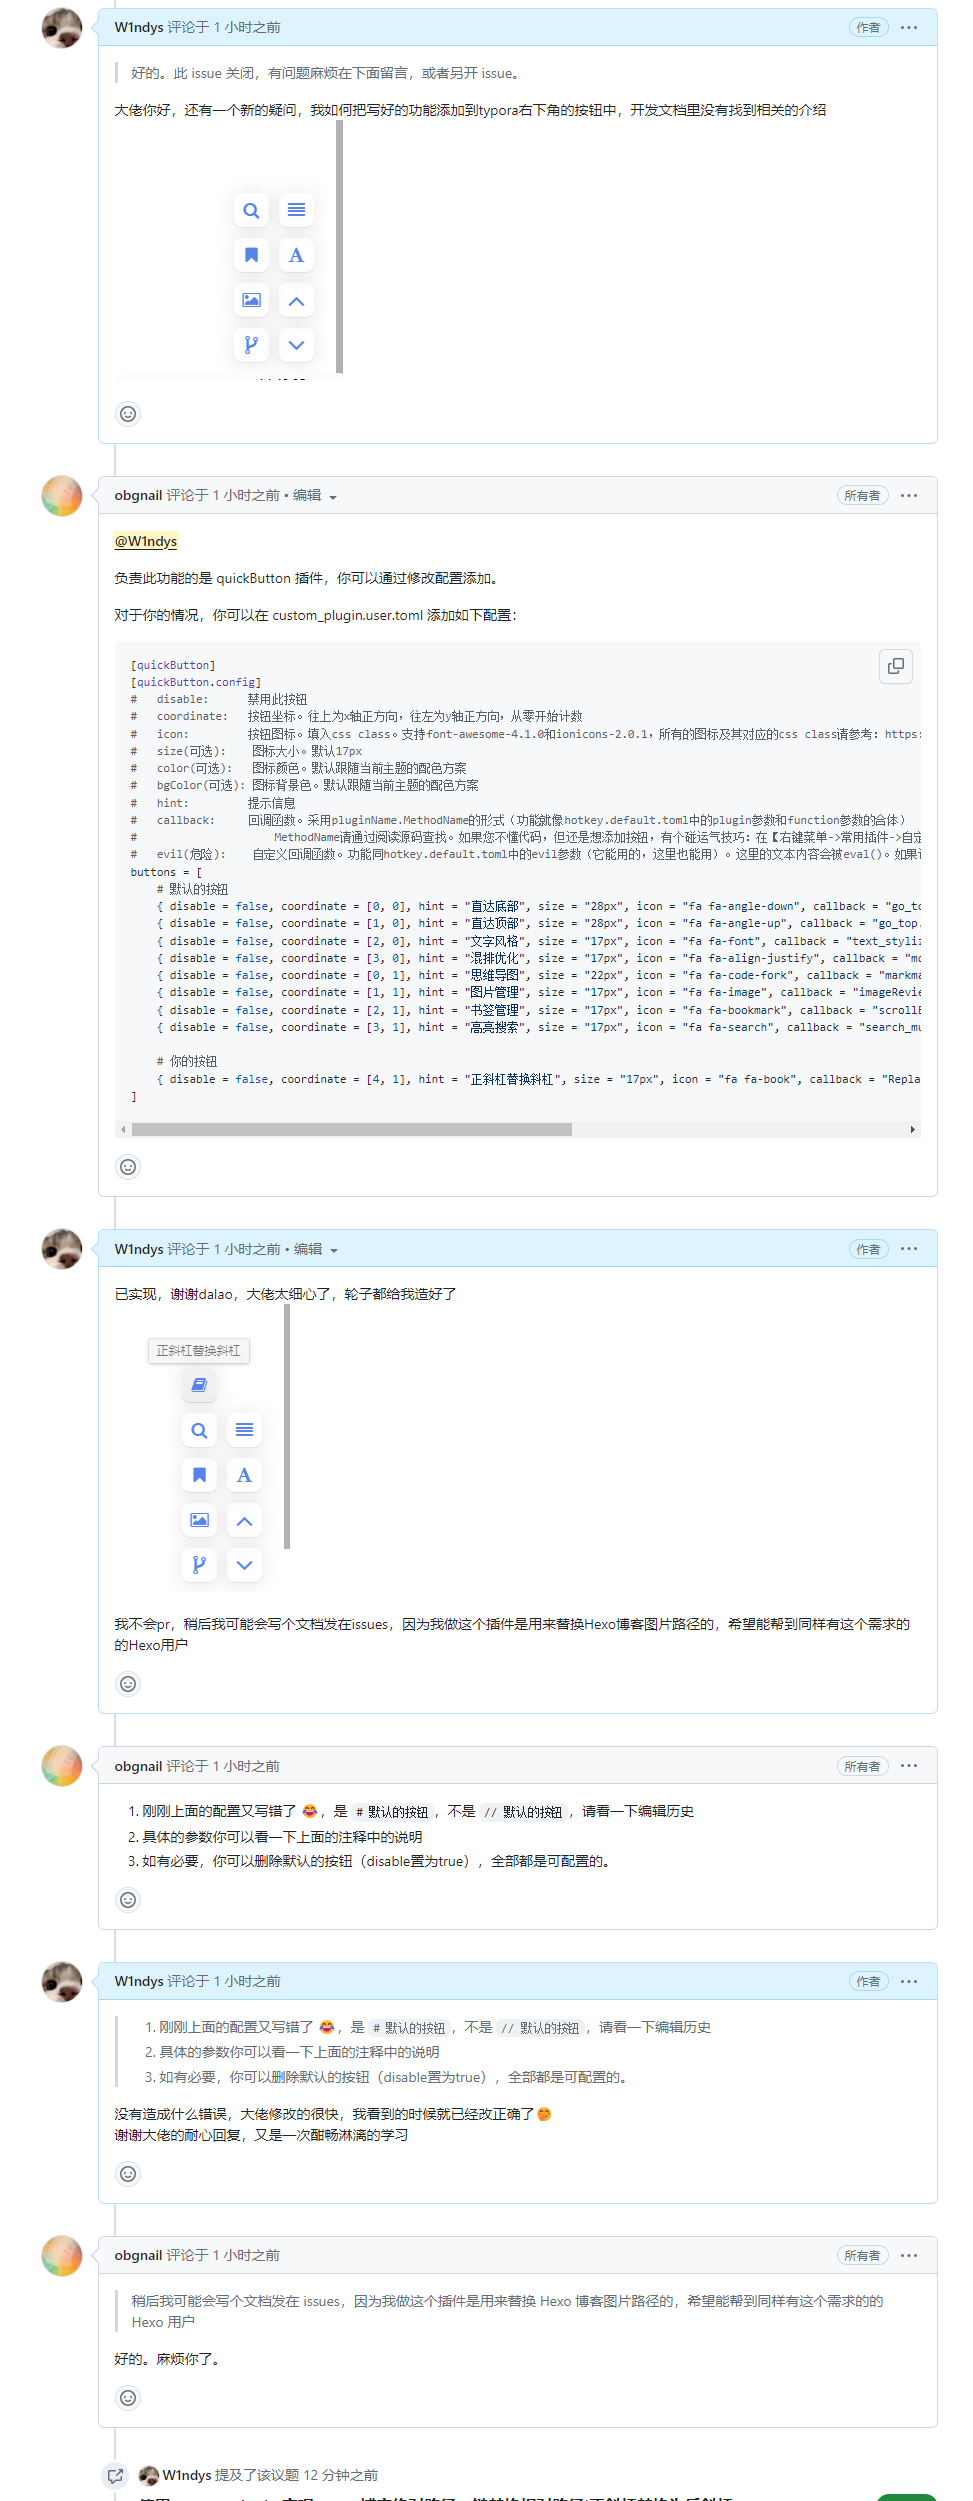
在上一步的基础上,继续添加代码
1 | [quickButton] |
重启 Typora 就可以在右下角看到添加的快捷按钮
效果展示
更新日志
2024 年 2 月 8 日 , 修了一处没有考虑到的 bug,原先只能转换绝对路径,对于(…./images/)形式的路径不会处理,修复后也包括了这种情况,具体改动可以查看编辑历史
2024 年 2 月 8 日 ,重写了代码逻辑,改为先进行反斜杠替换,然后进行路径重写为相对路径
2024 年 2 月 8 日 ,增加了一个实现效果 GIF 演示
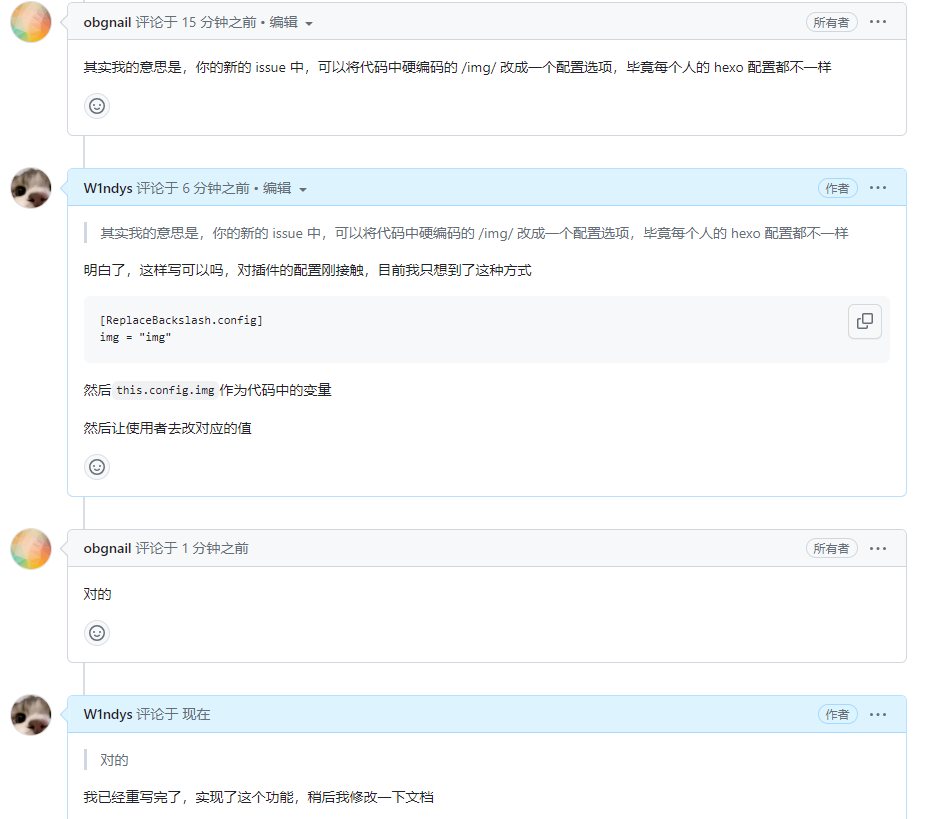
2024 年 2 月 8 日 ,受作者启发,将代码中硬编码的 ../images/ 改成一个配置选项,脚本使用者可以根据自己需要修改配置变量的内容
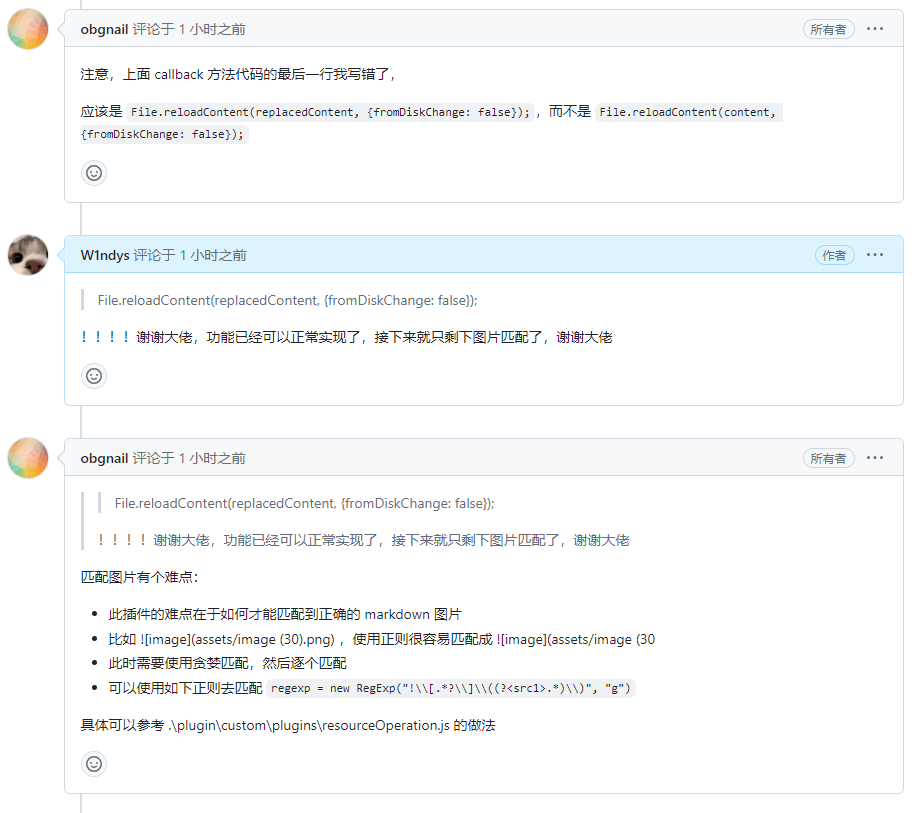
2024 年 2 月 9 日 ,代码已更新,经过作者的施教,增强了图片路径的匹配,解决了原先替换全文\的问题,现在只替换图片路径,插件作者太强了
如图
2024 年 2 月 10 日,大佬帮忙抓虫,纠正了快捷键的配置
2024 年 2 月 18 日,大佬指出错误,修改了快捷键的错误
鸣谢
感谢 Typora_plugin 作者,极大地方便了我的写作
感谢 ChatGPT,给了我代码写作的开头
- 标题: 使用Typora_plugin实现Hexo博客绝对路径一键替换相对路径|正斜杠替换为反斜杠
- 作者: W1ndys
- 创建于 : 2024-02-08 15:24:23
- 更新于 : 2025-10-27 19:25:00
- 链接: https://blog.w1ndys.top/posts/520cc65.html
- 版权声明: 版权所有 © W1ndys,禁止转载。