使用 Typora_plugin 实现 Markdownd 代码块一键填充指定编程语言

轮子

首先感谢大佬写好的轮子

使用的时候请把里面的 plugin_name 改为插件的实际文件名

1
2
3
4
5
6
7
8
9
10
11
12
13
14
15
16
class plugin_name extends BaseCustomPlugin {
callback = async anchorNode => {
const filepath = this.utils.getFilePath();
const content = await this.utils.Package.Fs.promises.readFile(filepath, 'utf-8');
const replacedContent = this.plugin_name(content);
await this.utils.Package.Fs.promises.writeFile(filepath, replacedContent);
File.reloadContent(replacedContent, {fromDiskChange: false});
}

// 在这里写主要的逻辑代码
plugin_name = content => {

}
}

module.exports = { plugin: plugin_name };

安装 Typora plugin

有关插件的安装教程可以看官方的仓库,Readme 写的很详细了

https://github.com/obgnail/typora_plugin/

创建 JS

./plugin/custom/plugins/ 文件中创建 MarkdownToCode.js 文件,把下面代码复制进去。

1
2
3
4
5
6
7
8
9
10
11
12
13
14
15
16
17
18
19
20
21
22
23
24
25
26
27
28
29
30
31
32
33
34
35
36
37
// ./plugin/custom/plugins/markdownToCode.js

class MarkdownToCode extends BaseCustomPlugin {
callback = async anchorNode => await this.utils.editCurrentFile(this.convertMarkdownToCode)

// 主要逻辑代码
convertMarkdownToCode = content => {
const components = [{ label: "语言", type: "input", value: this.config.code.toLowerCase() }];
this.utils.modal({ title: "添加语言", components }, async ([{ submit: targetLang }]) => {
if (!targetLang) return;

const updatedContent = this.updateCodeLanguage(content, targetLang.toLowerCase());
const filepath = this.utils.getFilePath();
await this.utils.Package.Fs.promises.writeFile(filepath, updatedContent);
File.reloadContent(updatedContent, { fromDiskChange: false });
})
}

// 更新代码块语言
updateCodeLanguage = (content, targetLang) => {
const codeBlockRegex = /```(?:\w+)?\s*([\s\S]+?)\s*```/g; // 匹配代码块,包括语言指定部分
const updatedContent = content.replace(codeBlockRegex, (match, codeContent) => {
// 匹配到的完整代码块
const codeLanguageMatch = match.match(/```(\w+)?/); // 匹配代码块语言指定部分
const codeLanguage = codeLanguageMatch ? codeLanguageMatch[1] : null; // 获取代码块语言
// 如果语言未指定或者不是目标语言,则添加目标语言标记
if (!codeLanguage || codeLanguage.toLowerCase() !== targetLang) {
return '```' + targetLang + '\n' + codeContent + '\n```';
}
return match; // 代码块已经指定为目标语言,不需要修改
});
return updatedContent;
}
}

module.exports = { plugin: MarkdownToCode };

启用插件

  1. 修改 ./plugin/global/settings/custom_plugin.user.toml,添加配置:
1
2
3
4
5
6
7
8
[MarkdownToCode]
name = "标注全部代码块" # 右键菜单中展示的名称
enable = true # 是否启用此自定义插件
hide = true # 是否在右键菜单中隐藏
order = 1 # 在右键菜单中的出现顺序(越大越排到后面,允许负数)

[MarkdownToCode.config]
code = "python" ##这里引号内改为你想要格式化的编程语言

这里引号内的内容改为你想要格式化的编程语言

添加快捷按钮

修改 ./plugin/global/settings/custom_plugin.user.toml,添加配置

1
2
3
4
5
6
7
8
9
10
11
12
13
14
15
16
17
18
19
20
21
22
23
24
25
26
[quickButton]
[quickButton.config]
# disable: 禁用此按钮
# coordinate: 按钮坐标。往上为x轴正方向,往左为y轴正方向,从零开始计数
# icon: 按钮图标。填入css class。支持font-awesome-4.1.0和ionicons-2.0.1,所有的图标及其对应的css class请参考:https://www.adfwebmagazine.jp/wp-content/uploads/test_v4.1.pdf 和 https://ionic.io/ionicons/v2
# size(可选): 图标大小。默认17px
# color(可选): 图标颜色。默认跟随当前主题的配色方案
# bgColor(可选): 图标背景色。默认跟随当前主题的配色方案
# hint: 提示信息
# callback: 回调函数。采用pluginName.MethodName的形式(功能就像hotkey.default.toml中的plugin参数和function参数的合体)
# MethodName请通过阅读源码查找。如果您不懂代码,但还是想添加按钮,有个碰运气技巧:在【右键菜单->常用插件->自定义插件下的插件】基本都是XXX.callback,其余插件基本都是XXX.call
# evil(危险): 自定义回调函数。功能同hotkey.default.toml中的evil参数(它能用的,这里也能用)。这里的文本内容会被eval()。如果设置此参数,callback参数会失效
buttons = [
# 默认的按钮
{ disable = false, coordinate = [0, 0], hint = "直达底部", size = "28px", icon = "fa fa-angle-down", callback = "go_top.goBottom" },
{ disable = false, coordinate = [1, 0], hint = "直达顶部", size = "28px", icon = "fa fa-angle-up", callback = "go_top.goTop" },
{ disable = false, coordinate = [2, 0], hint = "文字风格", size = "17px", icon = "fa fa-font", callback = "text_stylize.call" },
{ disable = false, coordinate = [3, 0], hint = "混排优化", size = "17px", icon = "fa fa-align-justify", callback = "md_padding.call" },
{ disable = false, coordinate = [0, 1], hint = "思维导图", size = "22px", icon = "fa fa-code-fork", callback = "markmap.onButtonClick" },
{ disable = false, coordinate = [1, 1], hint = "图片管理", size = "17px", icon = "fa fa-image", callback = "imageReviewer.callback" },
{ disable = false, coordinate = [2, 1], hint = "书签管理", size = "17px", icon = "fa fa-bookmark", callback = "scrollBookmarker.callback" },
{ disable = false, coordinate = [3, 1], hint = "高亮搜索", size = "17px", icon = "fa fa-search", callback = "search_multi.call" },

# 你的按钮
{ disable = false, coordinate = [4, 0], hint = "一键标注所有代码块", size = "17px", icon = "fa fa-code", callback = "MarkdownToCode.callback" },
]

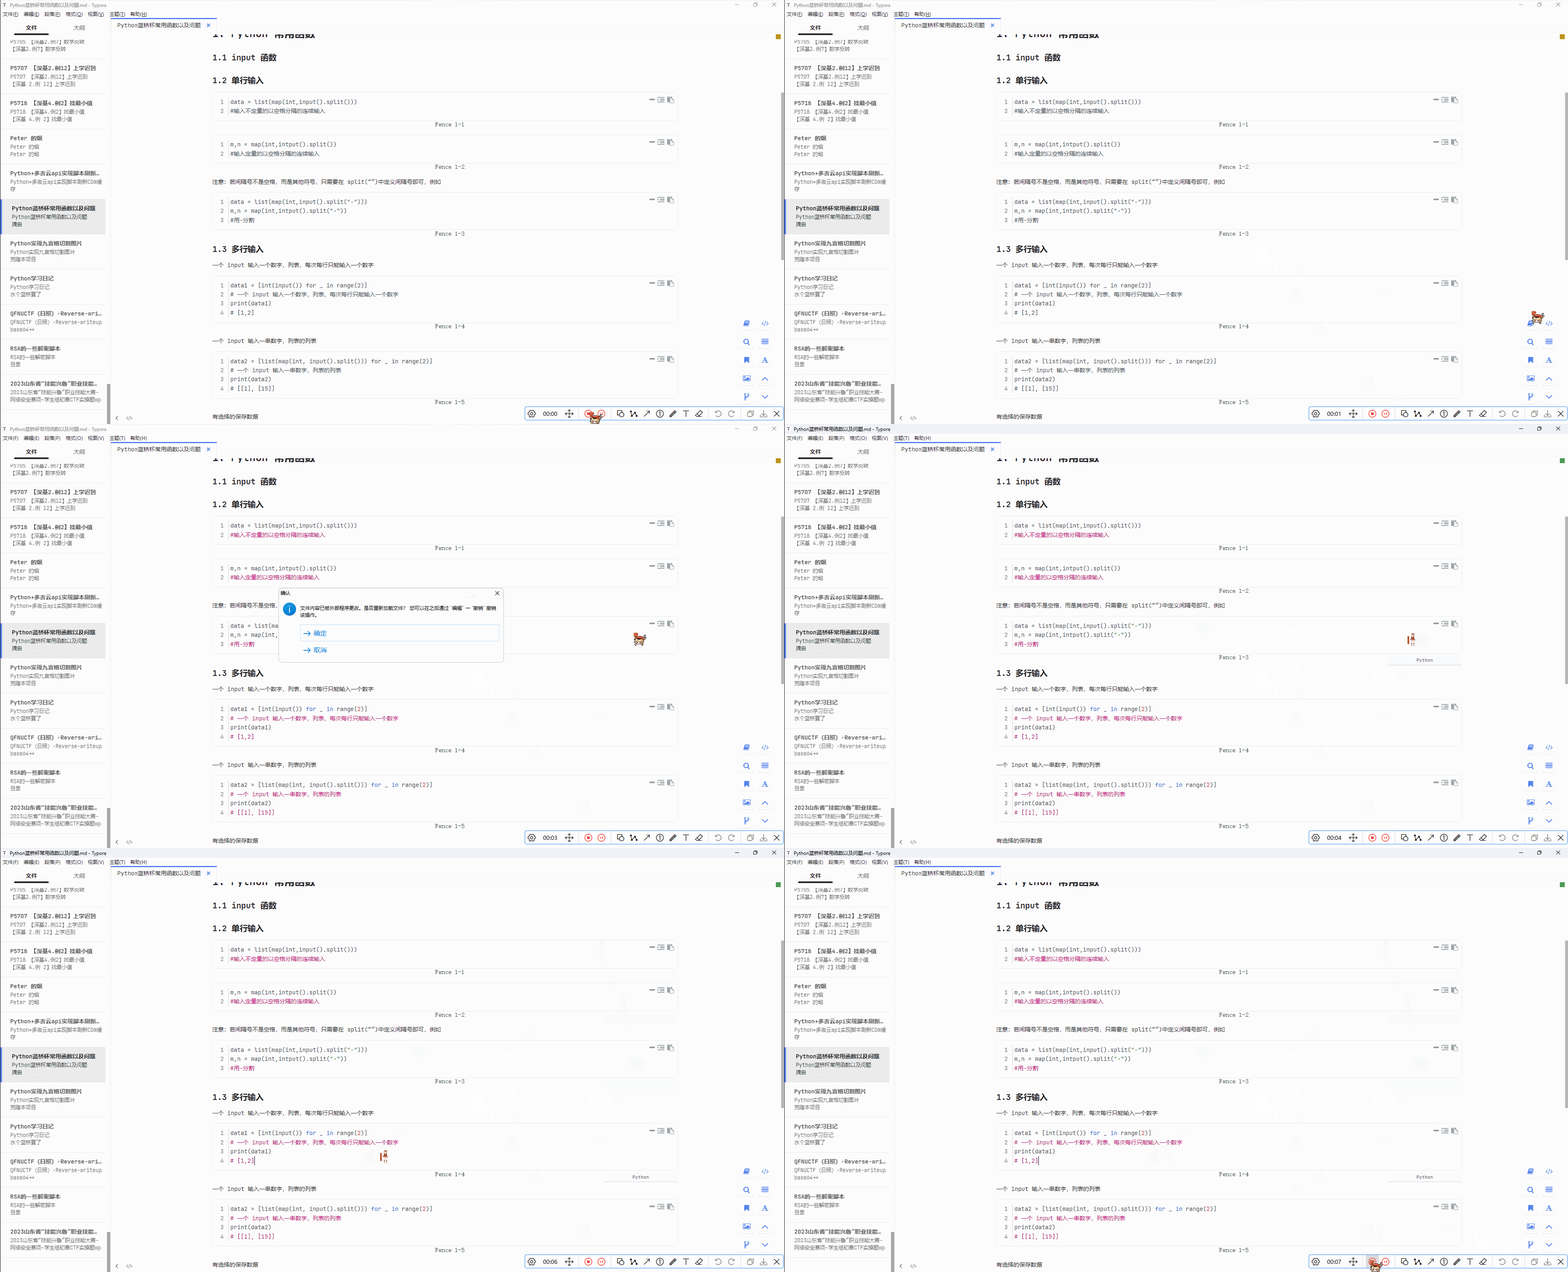
重启 Typora 就可以在右下角看到添加的快捷按钮

效果展示

recording


鸣谢

感谢 Typora_plugin 作者,极大地方便了我的写作

感谢 ChatGPT,给了我代码写作的开头

  1. https://github.com/obgnail/typora_plugin/
  2. https://w1ndys.top/
  3. https://chat.openai.com/